
Printed Circuit Board Assembly (PCBA) refers to the process of mounting electronic components onto a printed circuit board (PCB). To understand what is PCBA and its components, it’s important to note that these components include resistors, capacitors, diodes, and integrated circuits, all of which play a crucial role in ensuring the board functions correctly. Gaining knowledge about PCBA and its components provides valuable insight into the workings of modern electronics.
Precision is a key factor in PCB assembly. Misplacing even a single component can disrupt the entire circuit. Therefore, careful attention during assembly is essential to avoid significant errors. Maintaining accuracy not only ensures the board operates efficiently but also extends its lifespan. Addressing mistakes early on saves both time and materials while delivering superior results.
Tip: Always double-check component placement and connections to maintain precision.
Key Takeaways
Learn about PCBA parts like resistors and capacitors. Knowing them helps you understand how circuits work.
Check where parts go before soldering them. This avoids mistakes that can break the circuit.
Use the right tools like soldering irons and tweezers. Good tools make strong and tidy connections.
Clean the board after putting it together. A clean board stops short circuits and helps electricity flow better.
Test your board carefully to find problems early. Testing makes sure it works well and saves time and money later.
Tools and Materials for PCB Assembly
Tools Needed for PCBA
To build a circuit board, you need proper tools. A soldering iron connects parts to the board. Tweezers help pick up tiny pieces carefully. A multimeter checks if connections work correctly. An anti-static brush cleans dirt without harming delicate parts.
Set up your workspace with a magnifying lamp. It helps you see small details clearly. Wire cutters and strippers are useful for trimming and preparing wires. These tools make sure connections are neat and secure.
Materials Needed for Turnkey PCB Assembly
Turnkey PCB assembly needs good materials for reliability. Choose suppliers with certifications like ISO 9001 and IPC-A-610. Trusted suppliers test boards at every step of production.
Important materials include solder paste, flux, and quality PCBs. For fast circuits, use low-loss laminates instead of regular FR-4. This keeps signals strong. Place decoupling capacitors near IC power pins to keep voltage steady during quick changes.
Feature | Details |
|---|---|
Trace Shape | Use smooth curves or 45° angles to avoid signal issues. |
Power Flow | Add power and ground planes for steady energy supply. |
Heat Control | Use thermal vias and copper areas to spread heat evenly. |
Safety Gear for PCBA Assembly
Safety is very important when assembling PCBA. Static electricity can harm sensitive parts. Wear ESD wrist straps and use mats to protect your board. Safety goggles keep your eyes safe from solder splashes. A fume extractor clears harmful smoke from soldering.
Tip: Always touch a grounded surface before handling parts to avoid static damage.
Step-by-Step PCB Assembly Process
Getting the PCB Ready for Assembly
Before starting, check the PCB for any problems. Look for scratches or misaligned lines. Clean the board with an anti-static brush or alcohol. This removes dust and grease, making it ready for soldering.
Gather all the tools and parts you need. Arrange them neatly to avoid mistakes. Use the PCB layout diagram to see where each part goes. Preparing well saves time and helps prevent errors later.
Tip: Handle the PCB gently to avoid breaking small parts.
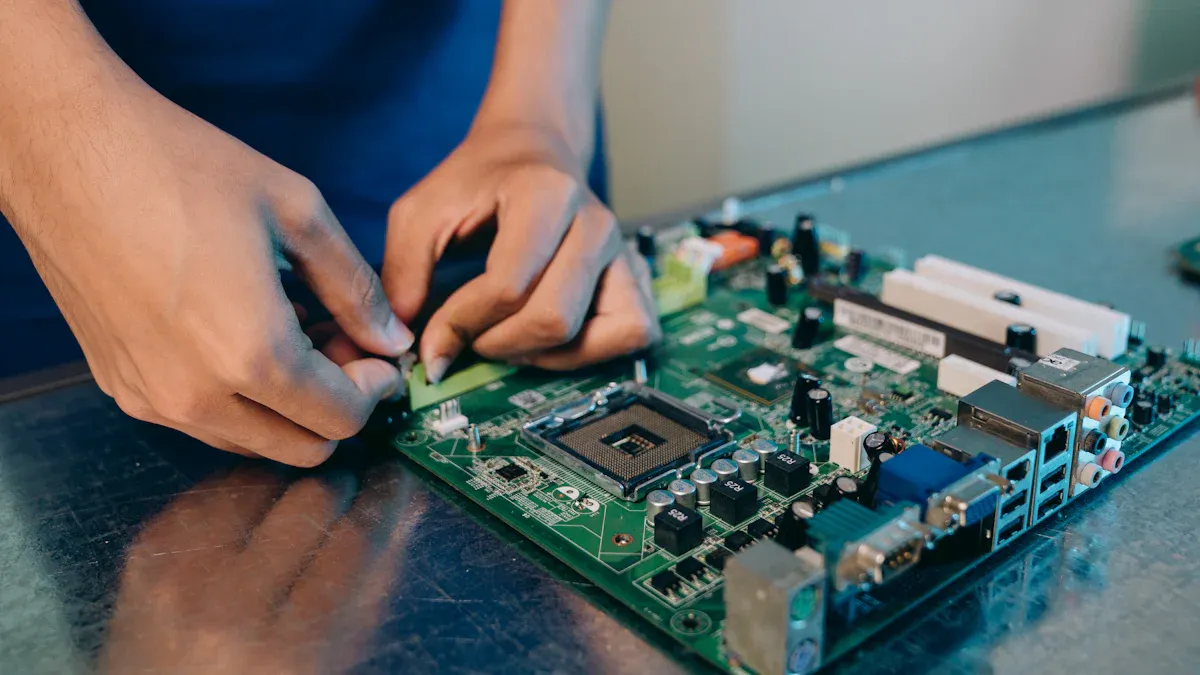
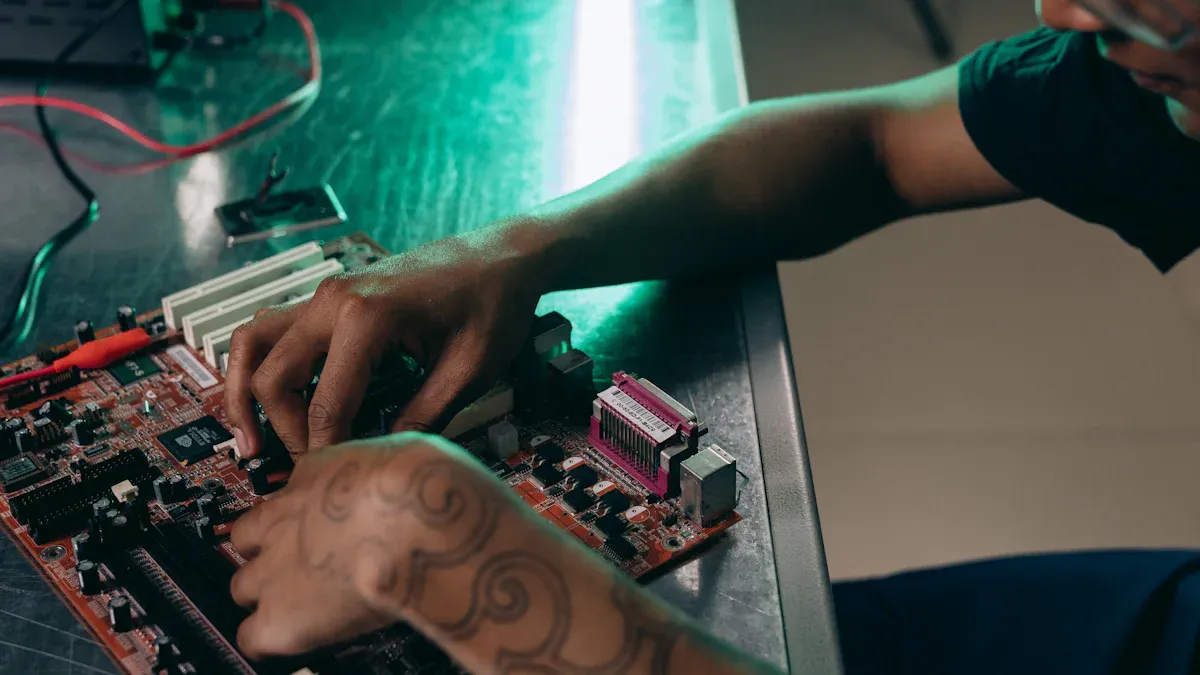
Placing Components in Order
Putting parts in the right spots is very important. Check the direction of parts like diodes and capacitors. Match them with the PCB markings. Start with small parts like resistors. Then, add bigger parts like chips.
Good placement makes the assembly better. It helps soldering be accurate and strong. Wrong placement can cause bad performance or damage the board.
Why correct placement matters:
Makes soldering easier and connections stronger.
Keeps the assembly solid and reliable.
Improves how well the PCB works.
Note: Always check part placement before soldering to avoid errors.
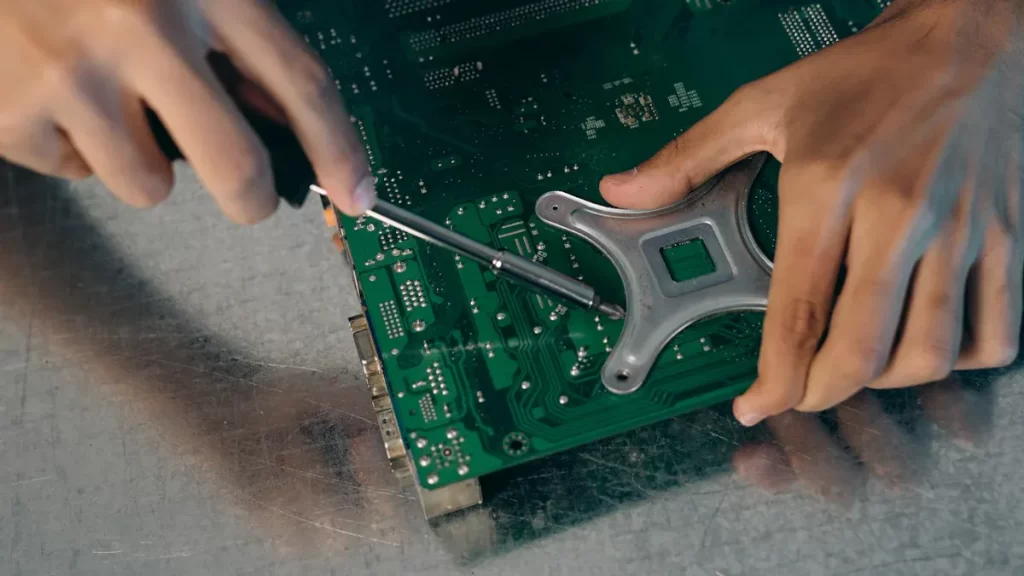
Soldering the Parts Properly
Soldering is a key step in PCB assembly. Use a clean soldering iron for smooth connections. Add a small amount of solder paste to avoid pin bridges. Keep your hand steady for neat joints.
Follow these tips for good soldering:
Clean the soldering tip often to remove residue.
Check the soldering iron for damage regularly.
Use heat-safe tools to protect nearby parts.
Different methods, like reflow or wave soldering, may be used based on the board’s design. Good soldering makes strong connections and avoids problems like weak joints or overheating.
Tip: If you’re new, practice soldering on an old board first.
Cleaning the PCB After Assembly
Cleaning the PCB is important for its performance and lifespan. Leftover flux, dirt, or dust can cause problems. Here are simple ways to clean your PCB:
Compressed Air: Blow away dust with special electronics air cans. Keep the can far enough to avoid harming parts.
Soft Brushing: Use a soft anti-static brush to clean tight spaces. This avoids static while removing dirt.
Vacuuming: Use safe vacuums made for electronics. Regular vacuums can create static and damage the board.
Solvent-Based Cleaning: Wipe the board with isopropyl alcohol (IPA). It removes grime and dries quickly without leaving marks.
Tip: Be gentle when cleaning to avoid breaking parts.
A clean PCB works better and looks nicer. It also prevents short circuits and improves electrical flow. Cleaning often keeps your PCBA in good shape.
Initial Testing for Functionality
Testing checks if the PCB works as it should. Early tests help find and fix problems before use. Below are common testing methods:
Testing Method | Description |
|---|---|
Finds solder mistakes and misplaced parts using cameras. | |
In-Circuit Testing (ICT) | Measures things like resistance and capacitance with probes. |
Functional Circuit Testing (FCT) | Tests the PCB in real-world conditions to ensure it works. |
X-Ray Inspection (X-Ray) | Looks inside solder joints to find hidden issues like gaps. |
Flying Probe Test | Uses moving probes to check electrical features, great for small batches. |
Environmental Stress Testing | Tests the PCB in tough conditions like heat or humidity. |
Functional testing is very important. It shows how the PCB handles real-world tasks. For example, testing power flow can uncover hidden problems. Careful testing ensures your PCBA is reliable.
Note: Always test your PCB to catch defects and confirm it works properly.
Common Mistakes in PCBA and How to Prevent Them
Avoiding Incorrect Component Placement
Placing parts in the wrong spots is a common mistake. Misplaced parts can cause electrical problems or make the board fail. To avoid this, always follow the PCB layout diagram. Check each part’s direction and match it with the board’s markings. Be extra careful with parts like diodes and capacitors. If placed backward, they can cause big issues.
Work step by step to avoid errors. Start with smaller parts, then move to bigger ones. This makes it easier to see and place everything correctly. Also, talk to your PCB maker about design limits. They can help you create a layout that avoids placement problems.
Best Practice | Description |
|---|---|
Leave enough space for parts | Stops parts from touching or causing electrical problems. |
Check all documents and designs | Makes sure everything is correct before making the board. |
Helps avoid design issues and weak spots. |
Tip: Always check part placement before soldering to save time and fix mistakes early.
Preventing Soldering Defects
Soldering problems, like too much or too little solder, happen often. These issues can make connections weak or unreliable. Too much solder can create bridges between pins, causing short circuits. To stop this, use only a small amount of solder paste. Keep your soldering iron tip clean for better results.
Reflow ovens help reduce soldering mistakes. They heat parts evenly, making solder flow smoothly. Always check your solder joints to ensure they are smooth and fully covered. Weak or uneven joints can cause the board to fail.
Note: Practice soldering on old boards to get better and avoid mistakes during real assembly.
Managing Overheating of Components
Too much heat can damage parts and shorten the board’s life. To prevent this, use tools that protect against heat and work quickly. Set your soldering iron to the right temperature to avoid overheating.
Use special techniques to spread heat across the board. Add thermal vias and copper areas to stop hotspots. During use, make sure air can flow around the board to keep it cool.
Tip: Use a thermal camera to find and fix overheating problems during testing.
Keeping Your PCB Clean
Cleaning your PCB well after assembly is very important. Leftover flux, dust, or dirt can cause short circuits or bad connections. A clean PCB works better and lasts longer.
Here are some easy ways to clean your PCB:
Isopropyl Alcohol (IPA): Gently wipe the board with IPA. It removes dirt and dries fast without leaving marks.
Ultrasonic Cleaning: Uses sound waves to clean small, hard-to-reach areas. Great for complex boards.
Compressed Air: Blows away dust without touching the board. Use special air cans to avoid static electricity.
Each cleaning method helps in different ways. The table below shows why cleaning is so important:
Benefit | Description |
|---|---|
Strong solder adhesion | Helps parts stick well to the board. |
Reliable THT solder joints | Stops rust and makes solder connections stronger. |
Better surface preparation | Makes it easier to place parts correctly. |
Tip: Always check the board after cleaning to make sure no dirt is left. A clean PCB not only works better but also looks neat and professional.
Why Testing Your PCB Matters
Testing your PCB is a very important step. Skipping it can leave problems unfixed, which might make the board fail. Testing makes sure your PCBA works as planned.
Here’s why testing is needed:
Finding problems early helps you fix them quickly.
Better quality means fewer returns and happier customers.
Testing is one of the most important steps in PCB assembly. Follow these steps to test properly:
PCB assembly is more than just putting parts together.
Functional tests show how the board performs in real situations.
By testing every time, you can avoid mistakes and make sure your PCB is reliable. Testing proves the board works well and improves its quality.
Note: Always test, even for small projects. It saves time and money later.
Quality Control and Testing in PCBA
Checking the Board by Looking
Looking at the board closely helps find problems. You can spot missing parts, bad soldering, or crooked pieces. Manual checks are good for finding big issues. But machines with cameras and smart software can find tiny mistakes. They catch things like wrong soldering or misplaced parts. This makes sure only perfect boards move ahead.
Machines also work faster than people. They lower mistakes caused by humans. Adding these machines to your checks makes your PCBA more accurate and reliable.
Tip: Use both manual and machine checks for the best results.
Testing If the Board Works
Testing shows if the board works in real life. It helps find problems early, saving time and money. Different tests have special uses:
True positives (TP), false positives (FP), and false negatives (FN) show how good the test is.
Average Precision (AP) and mean Average Precision (mAP) check how well defects are found.
These tests prove if the board meets quality rules. Using them avoids common PCB problems and ensures good performance.
Note: Write down test results to track problems and improve.
Testing the Board in Tough Conditions
Stress testing checks if the board works in hard situations. It finds weak spots and makes the board stronger. For example, bad handling before testing can cause tin to grow on the board. This can lead to short circuits. Tools like SEM and EDS help find these issues.
To stop these problems, test the board in heat, humidity, or shaking. This shows if it can handle real-world use and stay reliable.
Tip: Be gentle with the board before testing to avoid damage.
Keeping Records and Documents Organized
Keeping good records is very important for PCBA success. Clear records help track progress and check quality. They also ensure you follow industry rules. Detailed records let you check test results, fix problems, and make products better.
To keep everything traceable, use digital tools. Electronic Lab Notebooks (ELNs) are safer than paper records. They store data securely and prevent loss or damage. Laboratory Information Management Systems (LIMS) are also helpful. They update records automatically, making it easy to track every step of the process.
Here are some tips for keeping records:
Write down all tests, methods, and results.
Use digital tools to avoid mistakes and keep records safe.
Check your records often to meet industry rules.
Use real-time tools to spot and fix problems quickly.
Good records show proof of your work. They help find and fix issues if something goes wrong. For example, if a customer has a problem, records can show what happened and how to stop it from happening again. Regulators also check your records during audits to ensure you follow rules.
By following these tips, you can make your PCBA process better and more reliable. Keeping good records shows you care about quality and builds trust with customers.
Tip: Switch to digital tools like ELNs and LIMS to make record-keeping easier and more accurate.
Getting good at PCB assembly needs focus and care. Start by improving your SMT process to place parts correctly. Use tools like X-ray machines to find problems early. Automated production lines and strict quality checks help make better boards. These steps lower mistakes and improve results, as shown below:
Practice | Description |
|---|---|
Better SMT Process | Accurate placement of small parts like 01005 and BGA. |
X-Ray Checking | Finds solder problems in BGA and CSP parts to avoid issues. |
Automated SMT Lines | Makes assembly faster and more precise. |
AI Tools for Inspection | Cuts down errors and boosts success rates. |
Strong Quality Control | Keeps products consistent and improves overall performance. |
Follow these tips to get dependable PCB assembly results. Careful work and testing are the keys to doing it right.
FAQ
What is the difference between PCB and PCBA?
A PCB is just the empty board. PCBA has all parts attached. You use PCBA to test how it works or fix problems.
How can you avoid soldering mistakes during assembly?
Keep your soldering iron clean. Use the right amount of solder. Practice on old boards to get better. Check each joint to make sure it’s smooth and complete.
Why is cleaning the PCB after assembly important?
Cleaning gets rid of leftover flux, dust, and dirt. These can cause bad connections or short circuits. A clean board works better and lasts longer. Use tools like air cans or alcohol to clean it well.
What tools are essential for PCB assembly?
You need a soldering iron, tweezers, and wire cutters. A magnifying lamp helps you see small parts. Safety gear like wrist straps and goggles keeps you and the board safe.
How do you test a PCB for functionality?
Use tests like AOI or ICT to check the board. FCT shows how it works in real life. Testing makes sure the board is good and meets quality rules.
See Also
Ensuring High Standards in PCB and PCBA Production
Selecting the Ideal PCBA Manufacturer Tailored to You
Comparing SMT and Through-Hole: Which Assembly Method Prevails?
Selecting Capacitors and Resistors for Today’s Electronic Projects
The Essential Role of Ceramic Capacitors in Electronics Today